How to Build a Roof: A Complete Guide to Roofing Structure, Materials, and Professional Installation
Building a roof is one of the most critical parts of constructing or renovating a home. It is not just about placing shingles on top. A properly built roof is a layered system designed to protect the structure from weather, manage moisture, and provide long-term durability.
Whether you are trying to understand the process or considering taking on a smaller project, knowing how a roof is built helps you make better decisions. This guide walks through the structure, materials, and step-by-step process of building a roof, along with key considerations that impact performance and longevity.
Understanding the Basic Structure of a Roof
A roof is made up of multiple components working together. Each layer plays a role in protecting the home and ensuring proper drainage and ventilation.
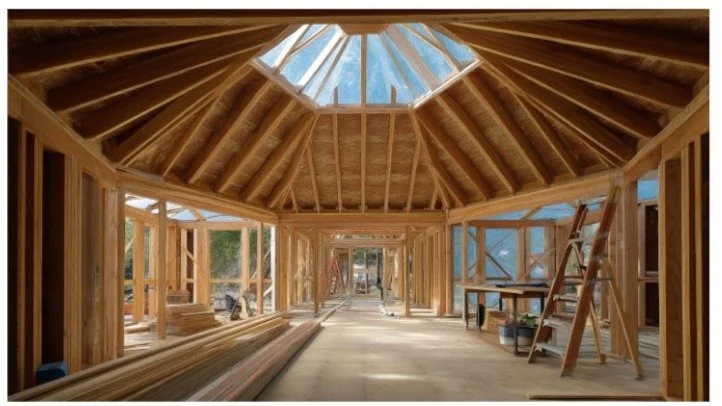
Roof Framing (Trusses vs Rafters)
The framing forms the skeleton of the roof. Most modern homes use trusses, which are pre-engineered structures designed for strength and efficiency. Rafters, on the other hand, are built on-site and allow for more customization.
Both systems are designed to support the weight of the roof while distributing loads evenly across the structure.
Roof Decking
Roof decking sits on top of the framing and provides a solid surface for all other materials. It is typically made from plywood or oriented strand board (OSB).
Proper installation of the decking is essential, as it acts as the foundation for everything that follows. Any weakness here can affect the entire roofing system.
Materials You Need to Build a Roof
Underlayment and Waterproofing
Underlayment is installed directly over the decking and serves as a protective barrier against moisture. It helps prevent water from penetrating the structure if the outer layer is compromised.
In areas prone to heavy rain or snow, additional waterproofing materials may be used to provide extra protection.
Roofing Materials
The outer layer of the roof is what most people see. Asphalt shingles are the most common due to their affordability and ease of installation. Metal and tile roofing offer increased durability and longer lifespans but come at a higher cost.
Choosing the right material depends on budget, climate, and desired longevity. When selecting materials and planning installation, working with experienced professionals like Symplify Roofing can help ensure the roofing system is built for long-term performance rather than just appearance.
Flashing and Ventilation Components
Flashing is used to seal areas where water is most likely to enter, such as around chimneys, vents, and roof valleys. Without proper flashing, even a well-built roof can develop leaks.
Ventilation is equally important. It allows air to circulate through the attic space, preventing moisture buildup and helping regulate temperature.
Step-by-Step: How to Build a Roof
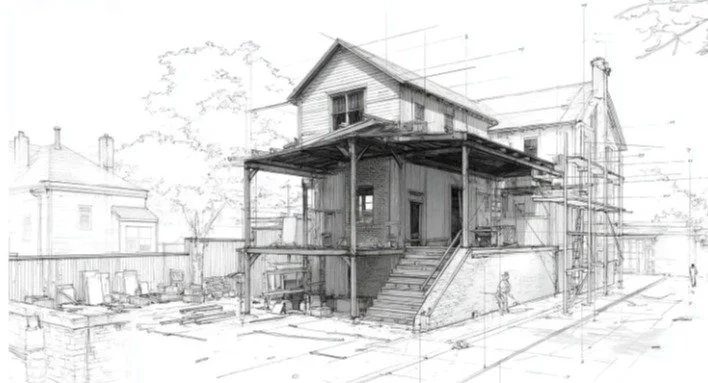
Step 1 – Frame the Roof Structure
The first step is installing the roof framing, either with trusses or rafters. This must be done with precision to ensure proper alignment and load distribution.
Incorrect framing can lead to structural issues that are costly to fix later.
Step 2 – Install Roof Decking
Once the frame is in place, decking is installed across the surface. Panels are secured tightly to create a smooth, even base.
Gaps or uneven placement at this stage can affect the performance of the entire roof system.
Step 3 – Apply Underlayment
Underlayment is rolled out over the decking, starting from the bottom and working upward. This layering method helps direct water away from the structure.
Proper overlap is essential to prevent moisture penetration.
Step 4 – Install Flashing and Drip Edge
Flashing is installed around vulnerable areas, while drip edge is placed along the roof edges to guide water away from the structure.
These components are critical for preventing leaks and protecting the roof’s edges.
Step 5 – Install Roofing Material
Shingles or other roofing materials are installed in overlapping rows, starting from the bottom and moving upward. Each layer is designed to shed water efficiently.
Attention to alignment and fastening ensures both durability and visual consistency.
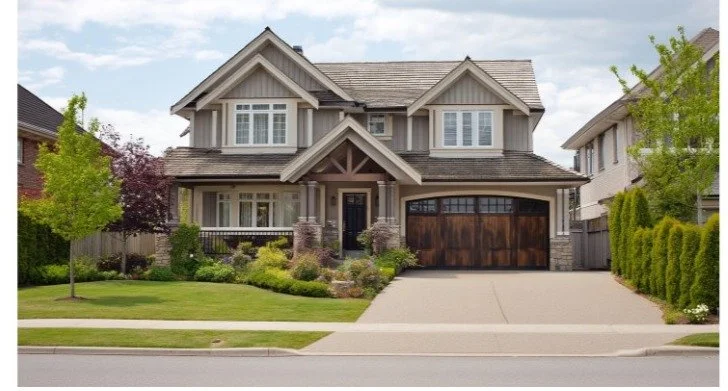
Step 6 – Add Ridge Cap and Ventilation
The ridge cap is installed at the peak of the roof to seal the top and complete the system. Ventilation components are also added to allow airflow.
This final step helps maintain the roof’s performance over time.
Safety Considerations When Building a Roof
Roof construction involves significant safety risks. Working at height requires proper fall protection, including harnesses and secure footing.
Weather conditions also play a role. Wet or windy conditions can make roofing dangerous and increase the likelihood of mistakes.
Using the right tools and following safety guidelines is essential to avoid injury and ensure a successful build.
Common Mistakes to Avoid
One of the most common mistakes is improper layering of materials. Each layer of the roof is designed to work with the others, and skipping steps can lead to leaks.
Poor flashing installation is another frequent issue. Even small gaps can allow water to enter over time.
Inadequate ventilation can cause moisture buildup, leading to mold or structural damage. Misaligned shingles or panels can also affect both appearance and performance.
Avoiding these mistakes requires careful attention to detail throughout the process.
DIY vs Professional Roof Construction
When DIY May Be Possible
For small structures like sheds or simple outbuildings, building a roof can be a manageable DIY project. These projects typically involve less complexity and lower risk.
When to Hire a Professional
Residential roofs are far more complex. They must meet building codes, handle structural loads, and withstand long-term exposure to the elements.
For full roof construction or complex structural projects, working with a contractor like Cobex Construction Group ensures the roof is built to code and designed for long-term durability.
How to Ensure Your Roof Lasts Long-Term
A roof’s lifespan depends on both installation and maintenance. Proper installation is the foundation, but ongoing care is equally important.
Regular inspections can help identify small issues before they become major problems. Cleaning debris, checking for damage, and addressing repairs early all contribute to a longer-lasting roof.
Choosing quality materials and ensuring proper ventilation also play a key role in long-term performance.
Conclusion
Learning how to build a roof provides valuable insight into one of the most important systems in a home. From framing and decking to underlayment and final materials, each step plays a critical role in protecting the structure.
While smaller projects may be suitable for DIY, residential roofing often requires professional expertise to ensure safety, durability, and compliance with building standards. With the right approach, a well-built roof can provide reliable protection for decades.