
The Outdoor Cleaning Tasks Most Homeowners Forget About
Did you know that proper home exterior maintenance can increase your property value by up to 5%? While most of us regularly tackle indoor chores, we often neglect crucial outdoor cleaning tasks that protect our biggest investment.
I've seen countless homeowners focus on sparkling kitchen counters and vacuumed carpets but completely forget about moss growing on their roofs or filthy light fixtures by their front door. Unfortunately, these overlooked areas can lead to expensive repairs down the road. Dirty light fixtures reduce visibility and security, neglected window screens trap allergens, roof moss causes structural damage, and unmaintained driveways develop cracks that worsen over time.
The good news? Taking care of these forgotten spaces doesn't require special skills or expensive equipment. In this guide, I'll walk you through the five most commonly overlooked outdoor cleaning tasks that will keep your home looking great and functioning properly for years to come.
Cleaning neglected outdoor light fixtures
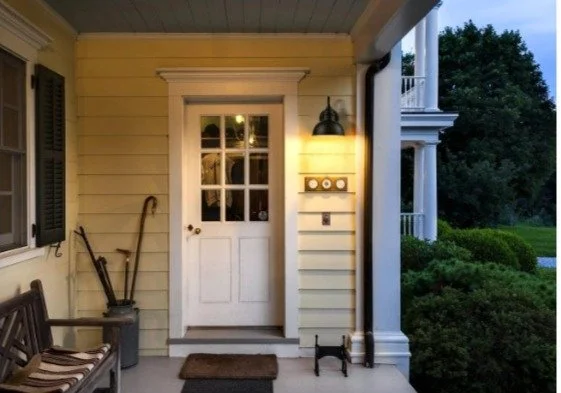
Image Source: Claxy Lighting
Outdoor light fixtures are the unsung heroes of our home's exterior. I notice many homeowners replace burned-out bulbs yet rarely clean the fixtures themselves. This oversight affects both the esthetics and functionality of your property's lighting system.
Why outdoor light fixtures are often forgotten
Outdoor lighting maintenance typically falls to the bottom of most homeowners' to-do lists. Unlike indoor fixtures that are easily visible at eye level, exterior lights are often mounted high on walls or posts, making them less noticeable during daily activities. Furthermore, many homeowners simply assume that rain will naturally wash away any dirt or debris.
Another reason these fixtures get overlooked is their gradual deterioration. Since dirt and grime accumulate slowly over time, the reduction in brightness happens so gradually that we hardly notice until the lighting becomes significantly diminished.
Problems caused by dirty outdoor light fixtures
Neglected outdoor lights create several issues beyond just looking unkempt. First, accumulated dirt and debris significantly reduce light output, compromising the safety and security these fixtures are meant to provide. When fixtures can't deliver their intended illumination, dark spots form around your property, potentially creating hazards.
Moreover, dirty fixtures require more energy to produce the same level of brightness, leading to increased electricity costs. Over time, accumulated debris can trap moisture, causing corrosion and damage to metal components. This corrosion not only affects appearance but can shorten the lifespan of what should be a long-term investment in your home exterior maintenance.
Additionally, bugs are naturally attracted to outdoor lights, especially white and cool-toned ones. Their remains, along with cobwebs and general grime, create unsightly buildup that diminishes your home's curb appeal.
How to clean outdoor light fixtures safely
Safety comes first when dealing with electrical fixtures. Always turn off the power at the circuit breaker before beginning any cleaning process. This step prevents potential electrical hazards and protects both you and the fixture.
For basic cleaning, gather these essential supplies:
Soft microfiber cloths
Mild dish soap and warm water
Soft-bristled brush for tight spaces
Glass cleaner (if applicable)
Clean towels for drying
Start by gently removing any covers, shades, or globes following the manufacturer's instructions. Wipe fixtures with a soft, dry cloth to remove loose dirt and debris. For stubborn grime, dip a cloth in a mild soap solution and gently clean the surfaces, paying special attention to crevices.
When cleaning glass components, avoid generic chemical cleaners which can leave a filmy residue. Instead, use a simple soap and water solution followed by thorough drying to prevent water spots.
For brass or copper fixtures that have become tarnished, avoid harsh chemicals that can dull the finish. A solution of vinegar and baking soda can help restore shine to heavily oxidized metal surfaces.
After cleaning all components, ensure everything is completely dry before reassembling and restoring power. This prevents potential electrical issues and water damage to sockets.
I recommend establishing a regular cleaning schedule, ideally every 3-6 months. Seasonal maintenance keeps your lights functioning efficiently and preserves your investment in your home's exterior appearance.
Washing window screens and sills
Window screens and sills quietly collect dust, pollen, and grime throughout the year. These often-forgotten elements of home exterior maintenance deserve much more attention than they typically receive. A thorough cleaning twice yearly can prevent numerous problems and keep your home looking fresh.
Why window screens and sills matter
Clean window screens directly impact your home's appearance and your family's health. They serve as the first line of defense against outdoor particles entering your living space. According to experts, clean screens ensure you're making the most of natural light, letting in the freshest air possible, and keeping your home looking beautiful.
Professionals recommend cleaning your insect screens twice a year—typically in spring and fall. Spring cleaning helps wash away winter's dirt and road salt, whereas fall cleaning removes summer's dust, pollen, and other allergens. Additionally, cleaning screens in fall prepares them for winter storage, which can extend their lifespan.
Window sills also require regular attention as they collect grime that can deteriorate protective coatings, look unsightly, and potentially lead to water damage and costly repairs over time.
Common issues from dirty screens
Dirty window screens trap much more than meets the eye. They collect dust, dirt, pollen, and other allergens that can worsen respiratory health. Essentially, neglected screens act like dusty fan filters, blowing contaminants throughout your home with every breeze.
Poor indoor air quality from dirty screens may contribute to coughs, sneezing fits, sinus problems, and potentially more serious respiratory issues. For individuals with asthma, allergies, or compromised respiratory systems, these effects become even more concerning.
Beyond health concerns, dirty screens can transfer grime to your windows. Rain hitting dirty screens spatters grimy water onto your glass , negating the effort of window cleaning. Furthermore, when screens aren't cleaned regularly, accumulated salts, sap, and other acidic substances begin to wear out the screen material itself.
The appearance impact also matters—dirty screens obscure visibility and natural light, making your home look less inviting from both inside and out.
Steps to clean window screens and sills
Cleaning window screens requires minimal tools but yields significant benefits. Here's an effective process:
Remove screens carefully - Take screens out of the window frame, noting which screen belongs to which window if cleaning multiple screens.
Prepare cleaning solution - Mix warm water with a few drops of mild dish soap in a bucket. Alternatively, a mixture of one part vinegar to three parts water works well.
Initial rinse - Lay screens outside and lightly spray with a garden hose to remove loose debris. Use light pressure to avoid damaging the mesh.
Gentle scrubbing - Using a soft-bristled brush dipped in your cleaning solution, gently scrub both sides of the screen. For stubborn areas, take extra care without applying excessive pressure.
Thorough rinse - Rinse screens completely with clean water until all soap residue is gone.
Drying - Shake screens gently to remove excess water, then let them air dry completely before reinstallation. Standing screens in the sun speeds drying.
Clean window sills - While screens dry, vacuum sills to remove loose debris, then wipe with a damp microfiber cloth and mild cleaning solution. For tracks, use a plastic putty knife wrapped in a cloth to clean crevices.
Reinstall properly - Once completely dry, carefully reinstall screens in their original windows.
For optimal results, perform this maintenance every spring and fall. This simple routine preserves your screens' functionality, enhances your home's appearance, and ultimately contributes to healthier indoor air quality.
Removing moss from the roof
Many homeowners remain unaware that the soft green growth on their rooftops represents a serious threat to their home's structural integrity. Moss might look charming on forest floors or garden stones, yet on roofing materials, it's an enemy in disguise.
Why roof moss is a hidden threat
Moss functions differently from most plants, collecting water through its leaves rather than roots. This unique characteristic allows it to thrive on your roof, particularly on north-facing slopes that receive less sunlight and stay damp longer. As a result, moss acts like a sponge, capable of absorbing 20-30 times its weight in water. This constant moisture retention creates ideal conditions for fungi growth and accelerates decomposition of roofing materials.
Overhanging tree branches compound the problem by providing additional shade and dropping debris that holds moisture and serves as food for moss. Though some homeowners find moss esthetically pleasing, its presence significantly reduces your roof's lifespan.
Damage caused by ignoring roof moss
The consequences of neglecting roof moss extend beyond appearance. Initially, moss traps soil and debris, creating consistently wet conditions on your roof. Over time, it penetrates deeper:
Moss roots directly into shingles, destroying them and creating opportunities for leaks
It lifts shingle edges, increasing risk of blow-off during wind events
Water seepage can damage underlying materials, including wood sheathing and attic insulation
Interior walls and ceilings become susceptible to mold growth, triggering health problems and allergies
This cascade of damage eventually compromises your roof's structural integrity, potentially making your home unsafe. Consequently, roof moss can lead to expensive repairs or premature roof replacement, with manufacturers typically considering moss contamination a result of improper maintenance—potentially voiding warranties.
Best methods to remove roof moss
For safe and effective moss removal, avoid high-pressure washing which can damage shingles and force water underneath them. Therefore, consider these recommended approaches:
For light infestations, gently sweep away moss using a long-handled soft-bristle brush in a downward direction to avoid lifting shingles.
For moderate growth, apply moss removers containing zinc compounds or potassium salts of fatty acids. Apply with a pump-style sprayer after cleaning the roof surface.
Nonetheless, remember that climbing onto a roof carries serious fall risks. If you're uncertain about tackling this task safely, professional roof cleaning services charge approximately 30–60 cents per square foot , making it a worthwhile investment in both your roof's longevity and personal safety.
Cleaning patio furniture thoroughly
Patio furniture faces constant exposure to harsh weather, yet many homeowners fail to include it in their regular home exterior maintenance routine. After a long winter, these outdoor pieces often appear dingy and uninviting, desperately needing attention.
Why patio furniture gets overlooked
Most people underestimate how quickly dirt accumulates on outdoor furniture. The gradual buildup happens so slowly that we hardly notice the decline in appearance until it becomes severe. Unfortunately, busy schedules also contribute to neglect, as cleaning outdoor furniture falls to the bottom of priority lists. Many incorrectly assume that occasional rain showers will wash away debris naturally. Nevertheless, rain and humidity actually worsen the situation by creating damp conditions ideal for mold and mildew growth.
Risks of not cleaning outdoor furniture
Allowing dirt to build up on your patio furniture leads to several problems. First, sun, rain, pollen, and general use damage the protective coatings that shield the furniture from elements. Once this protection deteriorates, the furniture becomes vulnerable to structural breakdown. Meanwhile, accumulated moisture promotes mold and mildew growth, creating potential health hazards for your family and guests. Regular cleaning extends your furniture's lifespan by preventing premature wear. Frankly, neglected furniture also diminishes your outdoor space's appearance and comfort.
How to clean different types of patio furniture
Different materials require specific cleaning approaches:
Wood furniture: Clean monthly with mild soap and warm water, avoid pressure washers, and apply sealant annually. For stubborn mildew, use white vinegar with a soft brush.
Metal furniture: Wipe every two weeks with mild soap and water, address rust spots immediately, and never use abrasive cleaners.
Plastic/resin: Clean biweekly with warm soapy water; it's the most low-maintenance option.
Wicker/rattan: Brush weekly to remove dirt from crevices, use mild soap for deeper cleaning, and avoid power washing.
Fabric cushions: Clean weekly during high pollen seasons and remove for storage when not in use.
Always ensure furniture is completely dry before covering or storing to prevent mold growth.
Rinsing and sealing driveways and walkways
Driveways and walkways silently endure harsh weather conditions year-round. These hardworking surfaces demand regular maintenance from companies like Compass Refresh to preserve both safety and curb appeal in your home exterior maintenance routine.
Why driveways and walkways need attention
Concrete and asphalt surfaces constantly face moisture, heat, and organic debris. In humid areas, these materials quickly develop black streaks, mildew, and algae growth. Shaded spots that retain moisture are primarily affected, with buildup occurring gradually enough that most homeowners fail to notice until significant damage occurs.
What happens if you skip this task
Neglecting these surfaces leads to serious consequences. Stains and discoloration permanently set in while surfaces become dangerously slippery when wet. Moisture penetrates porous concrete, causing long-term structural damage. Additionally, your property value suffers as potential buyers view deteriorating walkways as signs of poor maintenance. Cracks from trapped moisture eventually require costly repairs or complete replacement.
How to rinse and seal outdoor surfaces
Start with thorough pressure washing to remove built-up grime. Once cleaned, allow the surface to dry completely—typically 24-48 hours. Before sealing, repair any visible cracks with appropriate patching compound.
For sealers, choose between:
Acrylic sealers: Create protective films with good UV resistance
Penetrating sealers: Form chemical barriers against moisture without changing appearance
Regular maintenance every 2-3 years extends your driveway's lifespan despite its seemingly indestructible nature.
Conclusion
Taking care of these often forgotten outdoor areas pays significant dividends over time. Although outdoor maintenance might seem overwhelming at first, addressing one task at a time makes the process manageable and effective. Regular attention to light fixtures, window screens, roof surfaces, patio furniture, and paved areas prevents minor issues from becoming major expenses.
Remember that dirt accumulates gradually, which explains why we typically miss these maintenance needs until problems become obvious. Your home represents your largest investment, therefore protecting it requires consistent care beyond just the indoor spaces.
Weather conditions constantly test your home's exterior. Rain, sun, wind, and seasonal changes all contribute to wear and tear that demands regular attention. Most importantly, many of these tasks require only basic tools and supplies you likely already have on hand.
Consider creating a seasonal maintenance calendar for these five critical areas. Spring and fall work particularly well as ideal times to tackle outdoor cleaning projects. This approach ensures nothing gets overlooked while spreading the workload throughout the year.
The pride you feel when looking at your well-maintained property certainly makes the effort worthwhile. Beyond esthetics, properly maintained exteriors also function better, last longer, and provide safer environments for your family and guests.
Ultimately, consistent attention to these forgotten outdoor cleaning tasks protects both your financial investment and your family's health while creating a home exterior you can genuinely enjoy year after year.