
Best Tools for Apartment Renovation Contractors
Apartment renovation isn’t “construction.” It’s pressure. Tight hallways - 32 to 36 inches if you’re lucky - 5/8" to 3/4" plywood subfloors that flex if you look at them wrong, condo boards that say 8 AM to 5 PM and absolutely mean it, elevators you have to book like medical appointments, neighbours who somehow track time down to 6:01 PM.
Every tool you carry either reduces that pressure… or quietly adds to it.
You already know you need solid gear. The question isn’t if. It’s which tool actually earns its keep inside a 900-square-foot unit where 15 wasted minutes a day turns into 60+ lost labour hours a year - basically an entire workweek disappearing. The difference between a $99 compromise and a $399 workhorse isn’t ego. It’s whether you’re wrapping up at 3 PM or 7:45 PM texting apologies because you’re running late again.
Let’s walk through this the way it actually plays out on site.
Best Cordless Impact Driver for Fast Turnover Framing and Cabinet Install

You walk into a fourth-floor walk-up. No power yet. Ten kitchens to get through this quarter. You don’t need theoretical torque. You need something that drives clean, fast, and doesn’t wreck your wrist halfway through upper cabinets.
There are really three directions here:
18V Brushless Cordless Impact Driver (¼" hex) - 1,800-2,200 in-lbs torque (150-183 ft-lbs), 2,800-3,600 RPM, up to 4,000 IPM, compact 5.0"-5.5" head length. This is your structural and cabinet install engine (source).
12V Compact Impact Driver - 900-1,300 in-lbs torque, 2,500-3,000 RPM, 1.9-2.5 lbs bare tool. Lighter, easier overhead, better for hinges, fillers, and detail fastening.
Corded Impact Driver (6-8 amps) - Continuous output and no battery swaps, but only realistic if you’ve got reliable power and zero tolerance for cords in tight hallways.
Now, brushless motors aren’t marketing fluff. Brushed motors typically last 50-100 operating hours under heavy load before brushes wear down. Brushless systems eliminate that failure point entirely and often reach 1,000+ hours of active trigger time.
Key performance considerations
Brushless vs brushed
Brushed motors wear out after 50–100 heavy-load hours
Brushless motors often exceed 1,000+ hours
~15–20% better efficiency and 30–50% longer runtime
Battery reality
A 4.0Ah 18V battery ≈ 72 watt-hours
Expect 200–300 deck screws per charge
Weight = fatigue
3.2 lbs vs 4.5 lbs sounds small… until you’re overhead for two hours
Over a 6-hour window, that becomes 1,500–2,000 extra lifts
Clutch control matters
MDF screw withdrawal: 250–350 lb
Overdriving reduces holding strength → hinge sag → callbacks
Noise
90–100 dB under load
Higher torque = less trigger time = lower exposure
Cost
Brushless kits: $250–$400
Brushed: $99–$149 but last only 600–800 hours
Noise? 90-100 dB under load. OSHA allows 8 hours at 90 dB, but only 2 hours at 100 dB without protection (source). Faster torque means less trigger time, which means lower cumulative exposure.
Cost reality: $250-$400 for a brushless kit versus $99-$149 for brushed. But brushed gearboxes start wearing out after roughly 600-800 jobsite hours (12-18 months daily use). One failure mid-install can cost more than the upfront difference.
And standardize your battery platform. If consolidating down to six batteries instead of ten avoids $600-$900 in duplicate battery purchases, that’s not small money.
If framing and kitchens dominate your week, go 18V brushless. If you’re mostly overhead detail work, 12V feels better on your body. Your forearm will tell you which one you really need.
Best Multi-Tool (Oscillating Tool) for Clean Cuts in Occupied Units
This is where you either look surgical or sloppy.
You’re choosing between:
Cordless Oscillating Multi-Tool (10,000-20,000 OPM) - Mobility in tight kitchens and bathrooms.
Corded Oscillating Tool (2.5-4.0 amp motor) - Consistent output for long cutting sessions.
Quick-change blade systems - Blade swaps in under 10 seconds instead of 45-60 seconds with hex-key systems.
Oscillation angle matters. Tools in the 3.2°-4° range feel similar until you’re near finished surfaces. A 4° oscillation removes material up to 20% faster than 3.2°, but it increases chatter. On laminate flooring (8-12 mm thick) or veneer cabinets (0.6-1.0 mm veneer), chatter equals chipped edges. That’s visible damage.
Variable speed is non-negotiable. Slowing down near finished edges reduces splintering and micro-fractures.
Blade lifespan is money. Bi-metal blades usually give you 40-60 linear feet of cutting through wood and embedded nails. Carbide-grit blades last 3-5× longer for grout removal, where compressive strength often sits in the 3,000-5,000 psi range.
Battery drain is real. A 2.0Ah pack under heavy plunge cuts in ¾" plywood might last 15-25 minutes. If you’re cordless, carry backups.
Dust control isn’t optional. Fine drywall dust ranges from 0.5-5 microns. Silica can fall below 1 micron. The exposure benchmark for respirable silica is 50 µg/m³ over 8 hours. That’s why pairing this with a HEPA vacuum isn’t just nice - it’s smart.
If you’re constantly shifting rooms and angles, cordless makes sense. If you’re in a gutted unit cutting nonstop for hours, corded saves battery headaches. Decide based on how you actually work - not what sounds modern.
Best Long Nose Pliers for Removing Old Pipework Within Cavity Walls

Source: https://www.maunindustries.com/long-nose-parallel-plier-return-spring-160-mm/
Open a wall and find copper stubs from 1983. Clearance maybe two inches. That’s the reality.
Your choices are:
Extended Reach Long Nose Pliers (200mm-300mm / 8"-12") - Reach 2-3" deeper than standard pliers.
Bent Nose Pliers (45°-90°) - Work around obstructions.
Insulated Long Nose Pliers (rated to 1,000V) - Extra safety when electrical wiring shares the cavity.
A 4" × 6" drywall repair is manageable. An 8" × 12" opening doubles labour and materials.
Longer handles (up to 12") provide 20-30% more leverage than 8" pliers. Hardened tool steel rated 55-60 HRC resists jaw deformation under torque. Jaw alignment tolerance matters too - if tips are off by more than 0.5 mm, gripping ½" copper pipe (0.625" OD) gets unreliable.
Grip materials - dual-material versus straight PVC - reduce fatigue over repetitive extraction.
Maun’s range are the best for this, as the long jaws move in parallel, which gives you far better grip at a full stretch than traditional long nose pliers do.
Every inch of wall you don’t cut is time you don’t spend taping and sanding.
If clearance is tight, extended reach wins. If it’s open, shorter pliers give more crushing force. Think about the cavity first, not habit.
Best HEPA Shop Vacuum for Dust Control and Reputation Protection
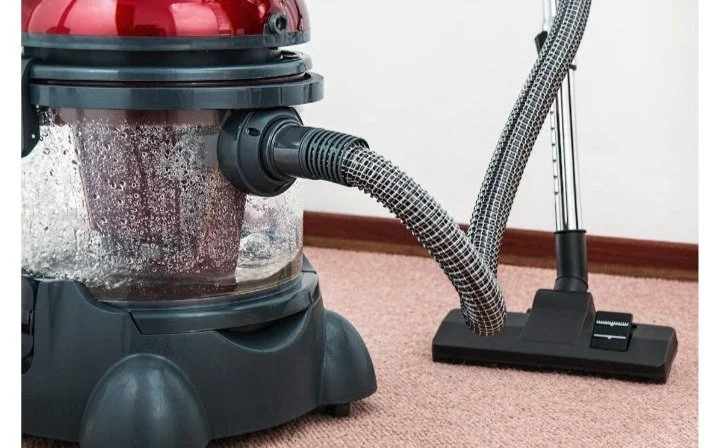
Drywall dust is quiet. It spreads. It lingers.
There are three real paths here:
HEPA-certified wet/dry vacuum (99.97% filtration at 0.3 microns) - True fine-particle capture.
Auto-filter-cleaning HEPA systems - Pulse-clean every 15-30 seconds to maintain suction.
Standard shop vac with aftermarket filter (often below 95% efficiency under sub-micron particles) - Budget option with performance compromises.
0.3 microns is the most penetrating particle size. HEPA at 99.97% capture means drywall dust (0.5-5 microns) and silica (often below 1 micron) are actually being removed (source). Sustained exposure above 50 µg/m³ over 8 hours can exceed regulatory thresholds.
Without auto-cleaning, suction can drop 30-40% after 10-15 minutes of continuous sanding. That’s slower cleanup and more airborne dust.
Airflow in the 130-150 CFM range is common for mid-grade HEPA units. Tank sizes typically range from 12 to 16 gallons. A 12-gallon unit handles roughly 3-4 bathroom demo cleanups before emptying. A 16-gallon unit weighs 2-5 lbs more empty and can approach 100 lbs when full of wet debris.
Hose diameter matters too. A 2.5" hose supports higher airflow for demolition debris. A 1.25" hose is easier to manoeuvre but reduces airflow by roughly 20-30%.
Noise runs 70-80 dB. Insulated housings can shave off 3-5 dB.
Yes, HEPA units cost $300-$700 compared to $100-$200 for standard vacuums. Replacement HEPA filters run $40-$80 versus $10-$20. But a single HVAC contamination cleanup can exceed $500.
If you work around occupied units or shared air systems, buy true HEPA. If you’re in an isolated full gut, maybe you can compromise. But dust always has a way of showing up later.
Best Compact Rotary Hammer Drill for Concrete Anchoring in Mid-Rise Buildings

Concrete doesn’t care about your schedule.
You’re basically deciding between:
SDS-Plus Rotary Hammer (1" class) - 2.0-3.5 ft-lbs impact energy, 0-1,500 RPM, 0-4,000 BPM. Ideal for ¼"-½" anchors in 3,000-5,000 psi concrete.
SDS-Max Rotary Hammer - 6-8 ft-lbs impact energy, 12-18 lbs tool weight, built for ¾"-1-½" holes.
Hammer Drill (6-8 amp corded) - Slower drilling, typically 30-50% longer penetration time.
An SDS-Plus can drill a 3/8" hole 3" deep in 4,000 psi concrete in about 10-15 seconds. A hammer drill might take 20-30 seconds. Multiply that across 40 anchors and you’ve saved 10-15 minutes and reduced bit wear.
Carbide SDS bits typically handle 100-150 holes before dulling. Hammer drill bits often wear faster under the same conditions.
Weight is the hidden killer. 6-8 lbs versus 12-18 lbs. Try holding 18 lbs overhead for 30 holes. You’ll feel that tomorrow.
Noise can exceed 100 dB. OSHA limits exposure at that level to 1-2 hours without protection.
Cordless SDS tools usually require 5.0Ah-8.0Ah batteries (90-144 watt-hours). Corded models give consistent output but less manoeuvrability.
Cost ranges roughly $250-$450 for SDS-Plus versus $500-$1,000 for SDS-Max.
If you’re installing cabinets, framing, or railings in apartments, SDS-Plus handles nearly all of it. Don’t overbuy power you won’t use.
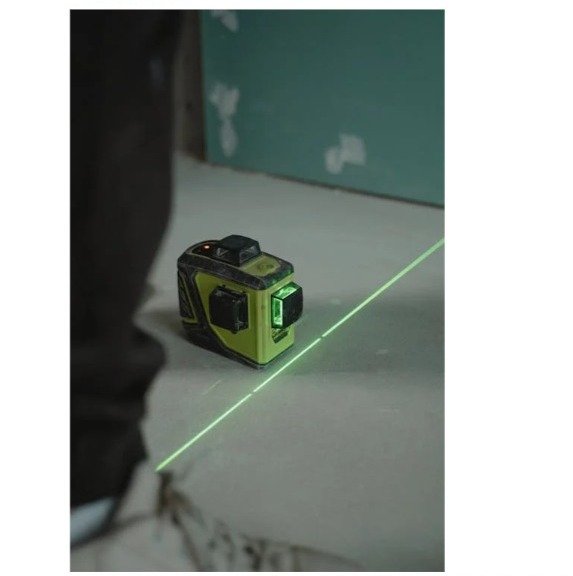
Best Laser Level for Speed and Client-Visible Precision
Clients notice misalignment down to 1/16" over 8 feet.
You’re looking at:
Self-levelling Cross-Line Laser - ±1/8" at 30 ft accuracy, ±4° self-level range, under 5 seconds levelling time.
360° Green Beam Laser - visible up to 100 ft indoors, IP54 rated.
Manual Bubble Level - roughly 0.5 mm/m accuracy.
±1/8" at 30 ft equals about ±0.4 mm/m. Lower-grade lasers drifting ±1/4" at 30 ft double your margin of error.
Green beams (~520 nm) appear up to four times brighter than red (~635 nm). That’s why you see them clearly in bright kitchens.
Lithium-ion battery life averages 6-12 hours. AA-powered units typically run 4-6 hours depending on intensity.
Pendulum systems can misalign after 3-4 ft drops. Housings rated for 1-meter drops reduce recalibration risk.
360° lasers cost $300-$600. Cross-line models run $120-$250.
If kitchens and tile are routine for you, buy the green self-leveller. Keep a manual level as backup. Tools get dropped. It happens.
Best Portable Jobsite LED Work Light for Dim Apartments and Evening Deadlines

Lighting changes everything.
You’re comparing:
Rechargeable LED Flood Light - 2,000-5,000 lumens, 100°-120° beam, 4-8 hour runtime.
Compact Clamp Light - 800-1,500 lumens.
Tripod Dual-Head Stand - up to 10,000 lumens combined, adjustable 4-7 ft height, covers 200-400 sq ft.
A 3,000-lumen light in a 50 sq ft bathroom delivers 600+ lux (source). Recommended task lighting levels often sit between 300-500 lux. That extra visibility shows tile lippage and paint defects before the client does.
Colour temperature 4,000-5,000K reveals surface issues clearly. CRI above 80 improves colour accuracy during paint matching.
A 5.0Ah lithium-ion battery equals roughly 90 watt-hours and supports mid-level output for most of a shift.
IP54 protects against dust and light splashes. Drop resistance of 1-2 meters reduces replacement frequency.
Tripods take up about 2-3 sq ft of floor space. Flood lights are easier to reposition but can cast shadows if poorly placed.
Adjustable flood lights for general work. Clamp lights for detail. When you can see clearly, you fix issues before they become rework.
This isn’t about gear obsession. It’s about reducing friction. Physical strain. Dust complaints. Noise stress. Layout mistakes.
The numbers matter. The weight matters. The runtime matters.
At the end of the week, you want to feel ahead, not behind.