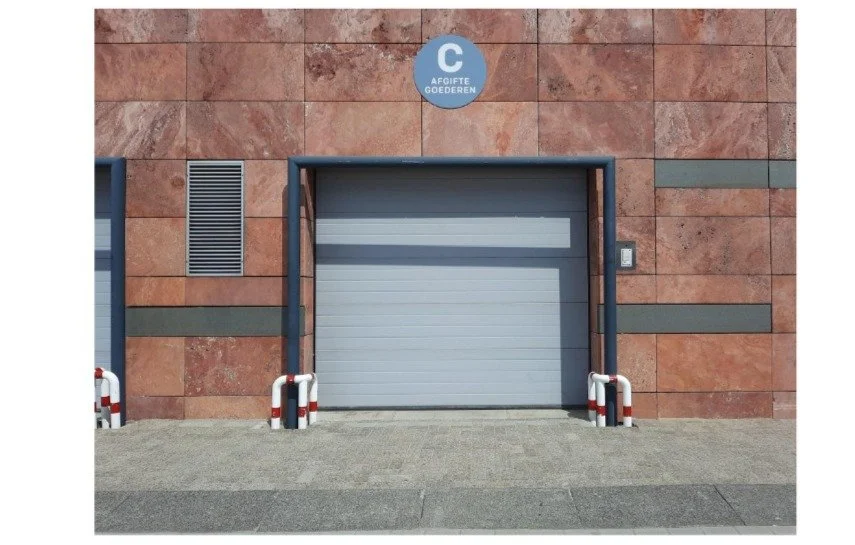
How to Plan a Garage Cleanout Before Your Next Car Project

An engine swap, brake refresh, vinyl wrap, or interior rebuild requires the same basics before the first bolt comes loose: floor space, good lighting, ventilation, and a clear path for moving the car. Plan the cleanout several days in advance, especially if you need waste collection or hazardous-material drop-offs. Once those details are settled, the physical work can usually fit into a weekend.

Step 1: Set the goal for the space

Start with what needs to fit rather than what you want to discard. A practical work bay includes the vehicle footprint, three to four feet of walking space on the sides you will use, room to open a door, and space for a rolling tool chest, jack, and stands.

Take these measurements before moving any boxes:

  • Interior length and width of the bay, measured wall to wall.

  • Ceiling height at its lowest point, including the open garage door and its hardware.

  • Garage door opening width and the approach angle from the driveway.

  • Vehicle length, width with the doors open, and height with the hood raised.

  • Depth of any shelving or cabinets you plan to keep.

Step 2: Build the cleanout plan

Choose your dates, check the forecast, and arrange for a helper if you have heavy items. Clear the driveway or a side yard the night before so you have room to sort. Set up five labeled zones: keep, donate or sell, recycle, landfill, and household hazardous waste. The last category includes automotive fluids, batteries, and some chemicals.

Step 3: Decide how the debris will leave

Your main options are taking several loads to a transfer station, hiring a junk-hauling crew, or renting a roll-off dumpster. Base the choice on debris volume, the weight of large items, your access to a truck, and how much lifting you can safely handle. A roll-off can be convenient for a weekend cleanout because you can load it gradually.

Dumpster providers such as Dumpsters.com describe a 10-yard roll-off as holding about three pickup-truck loads, which may suit a single-bay or light cleanout. A 20-yard container holds about six pickup-truck loads and is often used for larger residential projects. If you are removing shelves, furniture, drywall scraps, and years of stored boxes, the larger size may be more practical than arranging a second haul.

Placement matters as much as size. A container placed on private property may not require a permit, while street placement often requires municipal approval. Rules vary, so check with your city and hauler before delivery. Ask for the weight allowance, rental period, pickup process, and prohibited-material list in writing.

For example, CFL Dumpsters publishes driveway-friendly container sizes, accepted materials, rental terms, and service areas for Tampa Bay communities, including Brandon and Tampa. Use those details to compare options, but confirm the terms for your address and debris type before booking.

Step 4: Isolate automotive hazards first

Before general sorting begins, separate used oil and filters, coolant, brake and transmission fluid, gasoline, diesel, solvents, aerosols, propane cylinders, lead-acid vehicle batteries, lithium-ion tool batteries, and old tires. Do not place these materials in household trash or a roll-off unless the waste provider explicitly allows them.

Follow these basic handling rules:

  • Never pour oil, coolant, paint, or fuel into a household drain, storm drain, or the ground. Keep each material in a sealed, labeled container and use an approved recycling or household hazardous waste program.

  • Keep lead-acid batteries out of trash and curbside recycling. The EPA recommends returning them to a participating retailer or household hazardous waste facility.

  • Handle lithium-ion batteries separately. They can start fires when crushed or damaged in collection equipment. Tape exposed terminals or bag batteries individually, then take them to an appropriate recycling drop-off.

  • Store fuel only in approved containers with secure caps. Keep it in a cool, ventilated location away from living areas, heaters, sparks, and other ignition sources.

  • Ask where to take old tires. Many tire retailers and local waste programs accept them, sometimes for a fee.

Step 5: Empty quickly, sort once, then clean

Work from the back of the garage toward the door so you do not block your exit. Move each item directly to its assigned zone and make straightforward decisions. Repeatedly handling the same boxes is what turns a weekend cleanout into a month-long project. Direct bulky metal items, such as old shelving and bike frames, toward reuse or scrap recycling when possible.

Once the floor is empty, sweep and vacuum dust, treat oil stains, and inspect the work area. Test the outlets you plan to use, improve lighting where needed, and make sure the garage door track and opener path are clear.

Address ventilation before using an engine or fuel-powered equipment. The CDC advises never running a vehicle in an attached garage, even with the garage door open, because carbon monoxide can enter the home. Test the carbon monoxide alarms near the garage and sleeping areas.

Step 6: Reload for an efficient project area

Return only the items that support the project or regular household needs. Store long materials on secure wall racks, place consumables in labeled bins and keep frequently used tools within easy reach. This is also a good moment to plan garage workshop upgrades such as brighter LED lighting, modular tool storage or a sturdier workbench, while the walls and floor are still clear. Fuels, solvents and oily materials require suitable storage away from ignition sources and living areas.

Park the car so you can reach the required jack points and move a creeper along the vehicle. Keep walking routes, electrical panels, doors, extinguishers, and emergency exits unobstructed. Avoid leaving parts or tools on the floor where they can become trip hazards.

Step 7: Load the container and complete a safety check

Distribute debris evenly inside the container and keep everything below the rim so the load can be covered for transport. Ask the hauler before combining dense materials, such as concrete or shingles, with general household debris. Keep hazardous items out and confirm the pickup or exchange window in advance.

Finish with a five-minute safety walk. Check that fire extinguishers are visible, oily rags are in an approved covered metal container, battery chargers sit on a stable noncombustible surface, fluids are sealed and labeled, and carbon monoxide alarms are working.

FAQ

Which dumpster size fits a typical two-car garage cleanout?

A 20-yard roll-off is commonly used for residential cleanouts and holds about six pickup-truck loads. If you are clearing only one bay and have no bulky furniture or construction debris, a 10-yard container may be enough. Ask the provider to recommend a size based on a complete item list.

Do I need a permit to put a dumpster on the street?

Street placement often requires a permit, while driveway placement may not. Requirements vary by municipality, so check with your city or county before scheduling delivery.

Before cleanout day, confirm where you will take hazardous materials and how the remaining debris will be collected. After the project, schedule a brief decluttering session so the garage stays ready for the next job.

/
script>

Essential Industrial Roller Door Repair Strategies

Commercial facilities rely heavily on overhead barriers to protect daily inventory and maintain workflow speed across busy warehouses. Heavy usage creates wear on mechanical parts, leading to operational friction or sudden door failure.

Recognizing warning signs early keeps facility operations smooth and limits unnecessary downtime. Facility managers can protect operational efficiency by establishing structured repair practices and routine inspection steps.

Establishing Regular Inspection Schedules

Routine structural reviews catch hardware defects before minor gaps turn into costly breakdown emergencies. Operational cycles put constant stress on hinges, mounting brackets, and side guide tracks. Regular testing guarantees that security barriers operate smoothly during daily loading cycles.

Commercial security gates need routine checks to spot worn mechanical parts early. Facility managers schedule skilled technician visits for industrial roller doors to prevent unexpected operational halts. Scheduled maintenance preserves total structural strength across busy commercial properties.

Service frequency directly connects to daily operational volume. A British repair study notes that standard systems require full servicing every 6 to 12 months, with high-traffic areas needing quarterly reviews. Following timeline guidelines prevents costly system shutdowns.

Managing Track Alignment and Cleaning Routine

Dirt, metal shavings, and packing grease build up inside lateral tracks. Foreign objects cause curtains to stick or warp during movement. Keeping side channels clear allows smooth vertical movement.

A regional maintenance guide highlights cleaning tracks every few months using a soft brush or air blower. Removing grit prevents rust build-up along edge guides. Clean tracks reduce mechanical friction on overhead drive units.

Misaligned rails put uneven pressure on the motor and lifting cables. Technicians use spirit levels to adjust guide brackets back into plumb positions. Correct track positioning prevents panel binding along the guide frame.

Addressing Electrical and Motor Issues

Automated roller systems rely on electric motors, control boxes, and safety sensors. Loose wiring or blown fuses disrupt daily opening routines unexpectedly. System control panels need regular checks to verify power stability.

Limit switches define precise stop points at the top and bottom of each movement cycle. Drift in limit settings causes curtains to slam into floors or overwind inside hoods. Recalibrating stop limits protects bottom seals and overhead barrels.

Photoelectric sensors stop closing doors when workers or forklifts break the light beam. Cleaning optic lenses prevents false trigger stops during busy work shifts. Clear sensors maintain worker safety standards across active bays.

Lubricating Moving Components Correctly

Friction destroys bearings, rollers, and drive chains across heavy entry systems. Dry metal surfaces grind together, creating loud noises and premature part failure. Correct lubricant application keeps internal mechanics moving smoothly.

Heavy grease should not go on side tracks, since thick grease traps airborne dust and debris. Silicone sprays or light machine oils work best on exposed pivot points. Proper application protects moving surfaces without attracting grit.

Applying lubricant requires focused attention on high-wear components:

  • Roller bearings along guide tracks

  • Torsion spring assemblies

  • Chain drive sprockets and linkages

Maintaining a clean oil film extends hardware life and cuts operational noise.

Implementing Emergency Repair Protocols

Sudden system breakdowns disrupt daily shipping schedules and compromise building security. Having established repair protocols allows managers to respond fast during emergency situations. On-site staff should know manual override procedures for power outages.

Disengaging automatic openers allows workers to operate door curtains manually using hand chains. Testing manual hand chains monthly helps guarantee quick operation during power failure events. Staff training prevents panic when electronic systems fail.

Partnering with reliable local repair specialists guarantees rapid response times during sudden failures. Quick repairs limit perimeter exposure and keep business workflows moving. Strong preparation turns major breakdowns into manageable delays.

Handling Counterbalance Spring Maintenance

Counterbalance springs bear the heavy weight of solid steel curtains. High tension makes these springs dangerous to adjust without professional tools. Worn springs cause doors to fall quickly or rise unevenly.

Spring balance requires precise torque adjustments during regular service routines. Replacing stretched springs prevents sudden motor burnout from heavy lifting strain. Proper spring calibration protects automated drive systems.

Technicians inspect spring coil gaps for signs of metal fatigue or hairline cracks. Snapped torsion springs lock systems completely, trapping vehicles inside warehouses. Timely replacement avoids severe safety hazards on busy work sites.

Proper upkeep keeps heavy industrial entry systems moving smoothly day after day. Catching minor wear across tracks, springs, and drive motors stops unexpected breakdown delays. Facility teams save time and money by addressing small mechanical issues long before major components fail.

Systematic care secures commercial property boundaries and protects daily shipping output. Setting up clear maintenance habits supports long-term equipment performance across busy facility locations. Consistent service schedules give site managers complete confidence in their overhead security barriers.

/
script>

Top Tips for Effortlessly Removing Unwanted Hair

Maintaining smooth skin feels like a constant task. Everyday grooming routines take time, patience, and the right tools to achieve clean results. Exploring modern options simplifies personal care without unnecessary stress. Understanding different techniques makes choosing a routine simple and effective.

Knowing Your Primary Grooming Choices

Personal grooming goals vary depending on individual schedules and budget preferences. Many want to cut back on time spent shaving every morning. Selecting a routine that matches daily needs keeps skin feeling fresh year-round.

Traditional shaving remains popular for fast touch-ups, yet hair grows back quickly. Taking time to learn about different techniques leads to better results with far less skin irritation.

Choosing the right approach depends on hair type, skin sensitivity, and personal goals. Some techniques offer quick short-term fixes, whereas others focus on gradual hair reduction. Evaluating all available methods creates a plan tailored to individual lifestyle needs.

The Rise of Light-Based Hair Removal

Light-based procedures continue gaining popularity among people seeking smoother skin with less frequent maintenance. Many individuals turn to professional long-term hair reduction treatments to gradually reduce unwanted hair over multiple sessions. Laser procedures are now more accessible, effective, and widely embraced than in past years. Advanced equipment targets melanin in hair follicles to help disrupt future growth cycles.

Modern laser devices feature cooling mechanisms that protect surrounding skin. These built-in cooling tips make sessions much more comfortable for sensitive areas. Adjusting energy levels allows technicians to customize treatments for individual skin types.

Evaluating Fast Everyday Shaving Solutions

Shaving is one of the most accessible methods for removing unwanted body hair. It offers instant results at a low initial cost. Using sharp blades with hydrating gels prevents uncomfortable razor burn and ingrown hairs.

Replacing razor blades every five to seven uses protects the delicate skin barrier. Dull blades pull on hair follicles and create tiny nicks on sensitive skin. Applying a light lotion after shaving keeps skin soft and hydrated.

Warm water opens pores and softens coarse hair before shaving begins. Keeping razors clean and dry between uses prevents bacterial growth on blade surfaces. Proper technique makes shaving much more efficient. Gently gliding the razor without applying heavy pressure minimizes skin abrasions.

Exploring Waxing and Depilatory Creams

Waxing pulls hair directly from the root and provides weeks of smooth skin. Regular sessions can cause hair to grow back finer as hair follicles weaken. Skin remains hair-free for three to four weeks, ideal for busy monthly schedules.

Consistent waxing reduces the density of regrowing hair across several months. Managing skin hydration before sessions minimizes discomfort during application. Depilatory creams break down hair proteins just below the skin surface and offer a painless option for larger areas. Performing a quick patch test on a small area prevents allergic reactions and chemical irritation.

Formulated chemical creams work rapidly to dissolve hair structures. Rinsing thoroughly with cool water removes all leftover residue cleanly. Following up with a mild lotion keeps skin calm and balanced.

Market Growth and Industry Adoption

Demand for advanced cosmetic options continues to rise around the world. The laser hair removal industry will grow from $1.722 billion in 2025 to $10.32 billion by 2035. Steady growth reflects rising consumer trust in modern aesthetic technology.

Multiple treatments target hair during active growth phases. Most individuals need six to eight sessions for complete results. Spacing appointments four to six weeks apart delivers optimal long-term outcomes.

Professional technicians evaluate skin tone and hair density before starting sessions. Custom settings protect skin tissue as technicians deliver high energy directly to roots. Scheduled touch-ups maintain soft, hair-free skin across full annual cycles.

Comparing Permanent Electrolysis Methods

Electrolysis remains the only FDA-approved permanent solution available today and uses fine probes to deliver small electrical currents into individual hair follicles. This technique works for all skin tones and hair colors. Since each follicle is treated individually, sessions take longer than laser appointments. It works exceptionally well for smaller areas like eyebrows, upper lip, or chin.

Professional technicians tailor current levels based on hair thickness and location. Consistent appointments guarantee that active follicles are destroyed completely during treatment cycles. Patience during the process generates permanent relief from unwanted growth.

Preparing Your Skin for Smooth Results

Preparing skin properly before any removal process leads to cleaner outcomes and fewer complications. Simple steps protect skin health before and after sessions:

  • Exfoliate gently 24 hours before to remove dead skin cells

  • Avoid direct sun exposure and tanning beds before treatment sessions

  • Hydrate skin daily with non-comedogenic moisturizers to prevent dryness

  • Skip harsh chemical exfoliants right after hair removal treatments

Following these guidelines keeps skin clear and minimizes temporary redness. Proper pre-care habits prevent ingrown hairs across all hair removal methods. Investing time in post-treatment care supports rapid skin recovery and comfort.

Finding the ideal hair removal approach comes down to individual lifestyle and skin needs. Balancing quick fixes with long-term solutions creates a flexible grooming plan. With proper skin preparation and effective techniques, achieving smooth skin becomes simple and stress-free.

/
script>